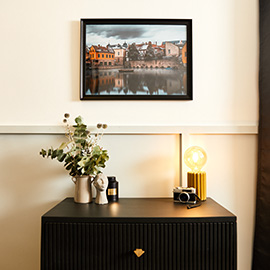
If your photos of buildings are lacking in punch and style, our guide to architectural photography is the perfect introduction to this exciting genre. This week we’ll show you how to avoid the common mistakes and make your architectural photography come alive.
Architectural photography gear
At a pinch, you can use any camera and lens combo to take photos of buildings, but there’s one specialist lens that can turn your average shots into spectacular, professional images… however, it does come at a price!
The tilt-shift lens is invaluable for controlling vertical distortion – the phenomenon that occurs when your lens is tilted up as you shoot, creating vertical lines that lean inwards. Yes, you can address this looming distorted effect in Photoshop or Lightroom, but getting it right in-camera allows you to compose your images without excessive cropping. However, one of these specialist lenses will set you back around £2,000, so investing in one is usually only done by professionals.
Of course, our guide to architectural photography is for everyone, so don’t panic – a decent wide or ultra wide lens with a CSC or DSLR will do just fine. Add a quality tripod and wireless shutter release and you’re good to go.
The process
Taking your first steps in architectural photography can be daunting, so we recommend picking a subject that you know fairly well – maybe a local stately home or museum. Give yourself time to explore the building from different angles so that you get a feel for whether you’re going to shoot it as part of a larger scene, or fill the frame and create a more intimate portrait.
Don’t forget to look for interesting details within the structure – there’s no rule that states you must shoot the entire building. You can play around with abstract images within the structure too, because showing an oft-seen building in a new light is wonderfully creative photography!
Do you want to include people for added context, or have a clean final image of the building? One trick you can use if you’re shooting at peak times and the venue is popular is to shoot with an ND filter for a longer exposure. People walking around will be too fast to be picked up by the camera's slow shutter speed, giving the illusion that you’re all alone – although you may have to shoot a second image of the sky and blend them together for a natural final image.
Generally, you’ll be shooting at base ISO with an aperture of between f/8-f/16, which should provide enough depth of field to keep everything in focus – something that should be easy with a wide angle lens. Use a tripod and shutter release to ensure your image is sharp and steady because your shutter speed might be quite low, and camera shake can ruin your shots.
This should be enough to get you going with this great genre, but if you want more info you can tune in next month where we’ll be looking at how to shoot interiors in our further guide to architectural photography.


