3 FOR 2 ON CANVAS PRINTS · FREE EXPRESS DELIVERY

Basket (0) CREATE CANVAS
Menu
← All AI artwork guides

Their ideas. Their colours. Their gift.

Create personalised colouring pages with AI

Turn an approved character into colouring pages featuring their favourite themes. Edit a prompt, use it with the stated reference in your image tool, then save the line art and print it at home.

Explore the guide ↓
An adventure to make your own
An adventure to make your own · AI-created artwork

Their ideas. Their colours. Their gift.

A tractor adventure, a friendly dinosaur or a little wizard who looks like them: you can create a colouring picture around the things your child loves. AI helps make the outlines. Your child chooses the colours and turns it into their own picture.

Print it at home for a rainy afternoon, make a birthday activity, or help them create a picture for Mum, Dad or someone else they love. You do not need to order anything to use this guide. If the finished picture becomes a favourite, you can frame the original or photograph it for a larger print later.

A finished adventure, then their own colours

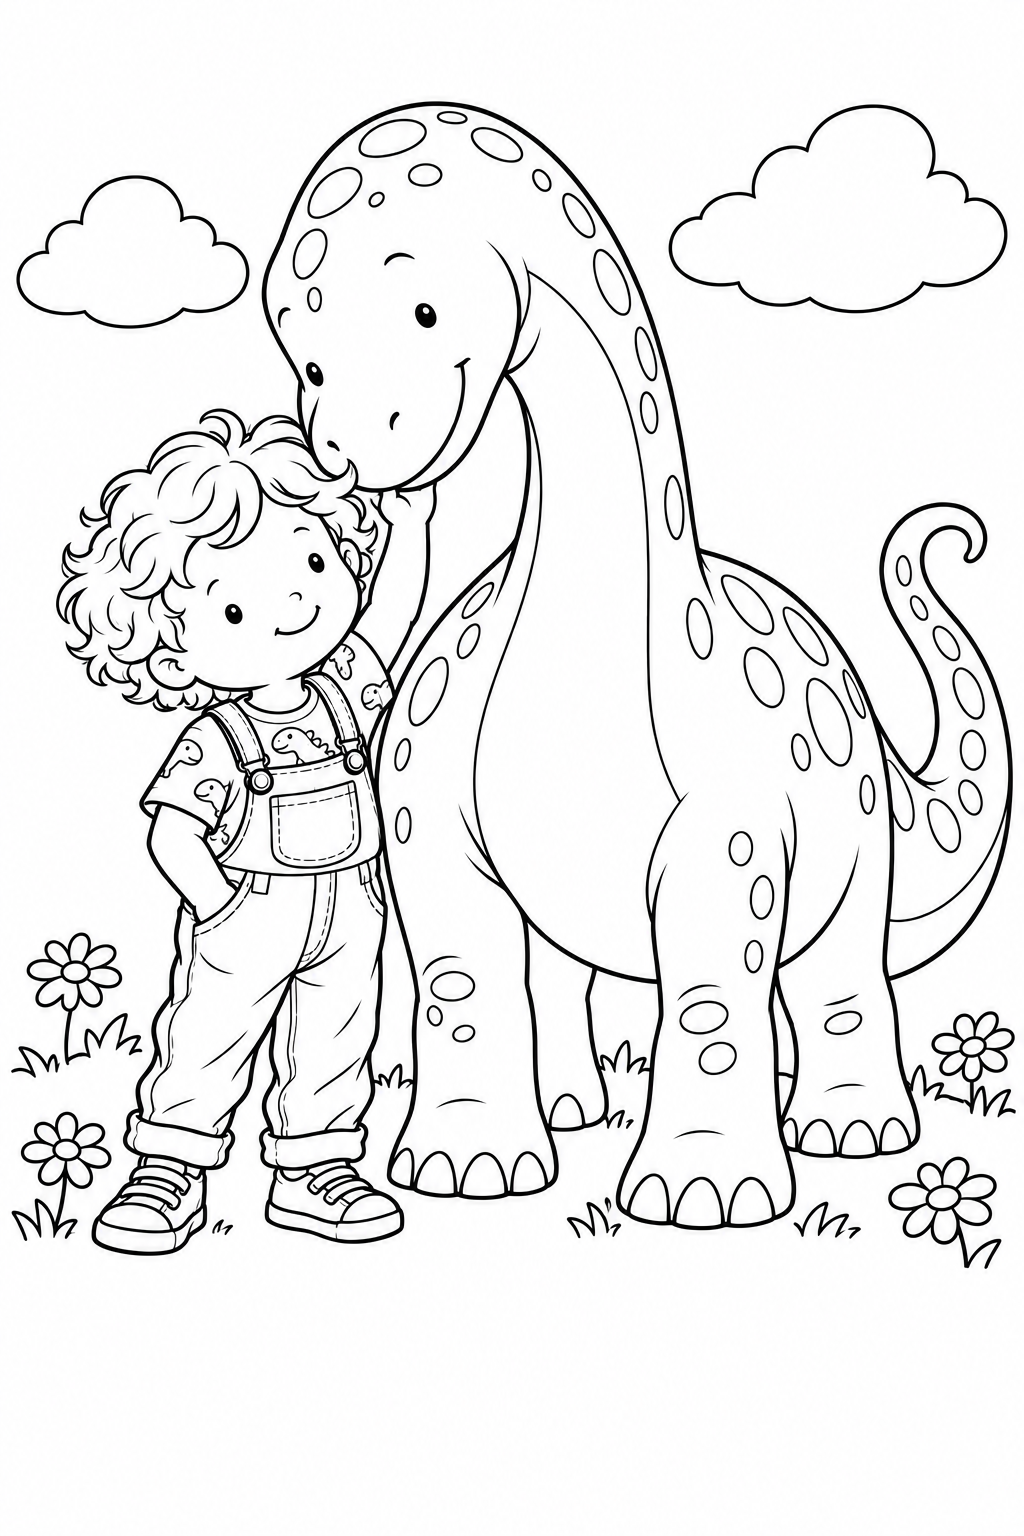
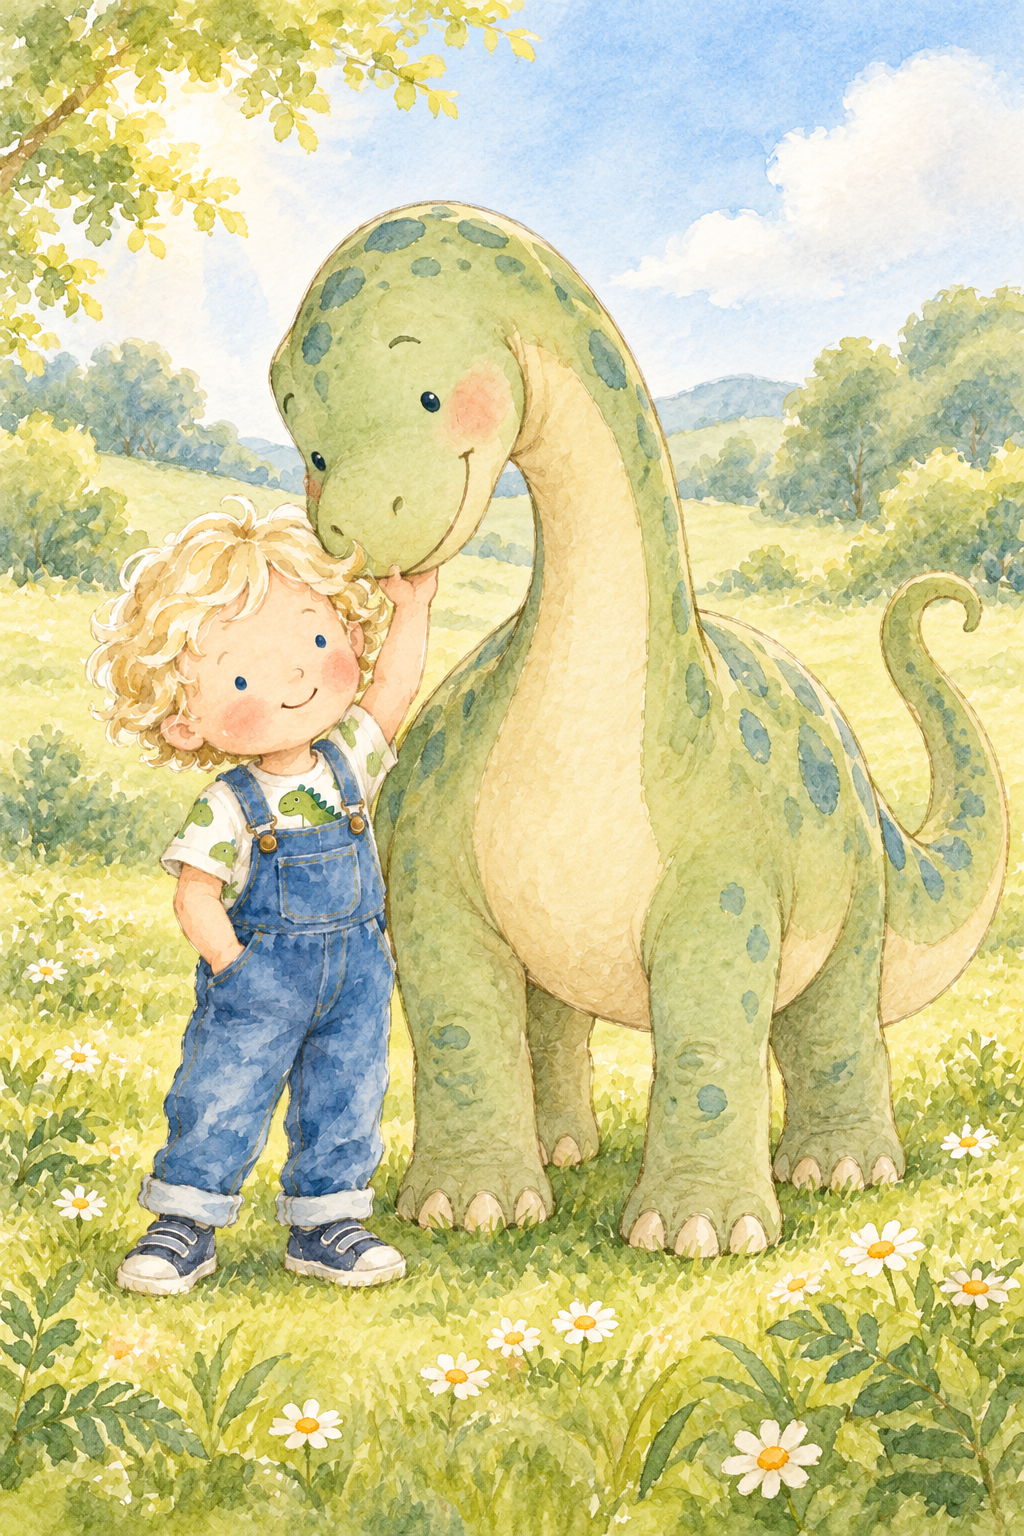
We used the finished picture of Harry touching his dinosaur's cheek as the reference for a colouring-page version. The outlines keep the pair's expressions and arrangement, replace the painted scenery with a few daisies and clouds, and leave blank space for Harry's own message.

Attach your own finished picture to use the conversion prompt; you do not need our production image.

MAKE IT YOURS

Turn the finished adventure into an activity
Reference illustration
Reference illustration · AI-created artwork
Black-and-white colouring outlines of Harry touching his dinosaur’s cheek, with daisies, two clouds and blank message space.
Black-and-white colouring outlines of Harry touching his dinosaur’s cheek, with daisies, two clouds and blank message space. · AI-created artwork

Image input
Attach your own finished illustration. This example used the finished Harry-and-dinosaur meadow scene.

The default prompt was used for the illustrated example. Your edits can produce different results. Edit the fields, then make any final changes in the full prompt. Changing a field rebuilds the full prompt.

Attach your own finished illustration. This example used the finished Harry-and-dinosaur meadow scene.

Read the original example prompt
Use case: style-transfer, identity-preserving edit.
Create ONE finished portrait-format black-and-white colouring-page illustration for a young child. Use the attached finished artwork as the ONLY image reference and convert that artwork faithfully into clean colouring-page line art.
Preserve the same child and dinosaur, their poses, expressions, relative sizes, silhouettes and arrangement. The child is on the left, smiling with the same tilted face, one hand affectionately raised under the dinosaur's cheek and the other in the dungaree pocket. Keep the child's recognisable facial shape, curly-hair silhouette, small simple eye design, toddler proportions, dungarees with front pocket and buttons, dinosaur-pattern T-shirt, turned-up trouser cuffs and trainers. Simplify curls and clothing folds carefully while retaining their character.
Keep the same dinosaur's friendly bowed face, curved long neck, four sturdy legs, outlined spots, cream-underbelly shape translated into an unfilled outline, toenails, and the same upward-curling tail. Maintain the exact affectionate interaction and the reference pair's proportions. Show both complete bodies and every shoe, foot and the full tail comfortably within the page. Scale the whole pair together only as needed to provide generous white margins and a clear blank area across the bottom for the child's handwritten message.
Replace all watercolour washes, painted colour, shadows and textures with clean smooth BLACK outlines on a PURE WHITE background. Slightly thicker outer outlines and simpler thinner inner details. All colouring areas must be large, clean and clearly enclosed. Hair, clothes, dinosaur spots, toenails and every other shape must remain white inside for colouring. Only very small eye, nostril or facial expression marks may remain solid black. No grey or tonal rendering.
Remove the detailed original landscape. Reduce the background to one simple ground line, a few large simple outlined daisies with enclosed petals and centres, and exactly two soft outlined clouds. Keep plenty of white space, especially a generous blank area at the bottom with no lines, flowers or lettering.
Return only one finished artwork. No coloured areas, grey shading, gradients, hatching, textures, tiny decorative marks, printed words, logos, watermark, frame or room mockup.

Choose the scene together

Begin with one question: what would they love to see themselves doing? It might be riding beside a tractor, sharing a picnic with a dinosaur or growing flowers with a friendly frog.

For a gift, add a detail connected to its recipient. Perhaps Dad loves cars, Mum loves gardening, or Grandad has a dog the child adores. The scene does not need to be complicated. One familiar detail and the child's own colour choices can make it meaningful.

Let the child choose the idea, colours and little additions. They can draw their own flowers, invent patterns for the clothes or add a message in their handwriting. Keep some white space for those choices.

Make the outlines in one of two ways

If you already have an illustration you like, attach that finished picture to your chosen image tool and ask for a colouring-page version. Use the conversion prompt below. It asks the tool to retain the important people, objects and arrangement while replacing painted colour with clean outlines. Compare the result with the original: simplified details and facial marks can change.

If you have saved a child character but have not made the scene yet, attach that approved character and describe the new scene directly as a colouring page. Use the character-to-scene prompt below. The saved character is the appearance reference; you do not need an earlier tractor, dinosaur or wizard scene.

A child character is optional. You can also make an interest-only colouring picture of tractors, frogs, racing cars or a favourite imagined world from a written description.

Keep the page enjoyable to colour

For a child who prefers simple colouring, ask for thick clear outlines, a few large shapes and plenty of white space. A tractor, child and two clouds may be enough. Avoid filling the sky with tiny stars or drawing every blade of grass.

For someone who enjoys details, add patterns, more objects or smaller spaces. Judge complexity by the child and the activity, rather than treating one age as a fixed ability level.

You can simplify a first result with this short follow-up: Make the colouring areas larger and the outline design simpler. Keep the same child, main subject and scene arrangement. Remove tiny textures, dense patterns and unnecessary background objects. Use clear closed outlines and a white background.

Print a small version at home first

Save the finished outline file at the highest resolution your image tool provides. For an ordinary home activity, start with an A4 sheet or another size your printer supports.

Open print preview, keep the image proportions and use the option that fits the complete picture within the printable area. Check that the face, feet and important objects fit. Print one copy first to see whether the lines are clear and the spaces are comfortable to colour. Print-setting names vary between devices.

For colouring with crayons or pencils, a home print on paper your printer accepts is an easy starting activity. Check the ink is dry before colouring. Markers and wet paints need a surface that suits those materials; test them on a spare sheet.

Choose a surface for painting

Printing paper and painting paper serve different purposes. For watercolour, choose an absorbent paper made for that paint. Standard canvas prepared for oil or acrylic is not the same as watercolour canvas. Follow the chosen art material's instructions.

If your home printer cannot handle the painting paper you want to use, print the outline on ordinary paper and use it as a reference for drawing the scene onto suitable art paper. You do not have to risk feeding unsupported thick stock through the printer.

For a canvas gift, an artist's painting canvas suited to the chosen paint is one route. Another is to paint the picture on appropriate paper, then photograph or scan the finished painting and have that image printed on canvas.

A printed poster or canvas outline may also become a hand-finished project when its exact surface and colouring materials are compatible. Use a spare sample before starting a gift. Ask the printer about compatibility with your chosen colouring materials before using a professionally printed surface for a hand-finished gift.

Let them make the picture theirs

The colours do not have to match the original illustration. A purple tractor, a rainbow dinosaur or a blue sun can be the child's decision.

Leave room for their marks rather than trying to correct everything. They might draw freckles, change the dinosaur's spots or add a favourite toy. For a gift, let them add their name, date and message themselves, or help with the writing if they want.

AI provides a starting outline; the colouring, painting and added details are the child's contribution. Describe the finished picture honestly in any gallery.

Make a gift for Mum, Dad or someone they love

Try a child holding a bunch of oversized flowers, a dinosaur carrying a blank birthday card, or a garden full of the recipient's favourite things. Leave an empty area where the child can add a message.

You could give a home-framed original, make one picture from each sibling, or create a set showing three things the family enjoys together. Choose a frame that fits the finished sheet, and let paint dry before framing.

Browse picture frames at IKEA

Keep a digital copy of a picture you want to save. Scan it if you can, or photograph it square-on in even light so the page edges look straight. Check that the child's colours and details are visible, crop away the surrounding table, and keep the largest original file. Review the image and crop at the intended print size before ordering a larger poster or canvas.

More ideas to try

  • Harry and his friendly dinosaur delivering flowers.
  • A child in a tractor beside a barn with space to draw their own animals.
  • Mum's imaginary garden with the child's favourite creatures.
  • Dad's dream racing car, with its colours chosen by the child.
  • A little wizard making a butterfly appear.
  • A frog astronaut having a snack on the moon.
  • A family dog exploring a woodland path.
  • A picnic with everyone's favourite foods.
  • A birthday picture with a blank message space.
  • Three siblings creating three different adventures.
  • A big shared sheet where each child colours one part.
  • A picture of a future adventure the child invents themselves.

Finish at home, or turn it into a print

A useful result might simply be an enjoyable afternoon and a picture on the fridge. It could also be an original worth framing or a painting you want to reproduce for family.

If you choose a poster or canvas print later, you can use any print service that accepts your finished artwork. Our existing upload routes are another option. Check the saved image, size and crop before ordering. You can use every activity in this guide without buying a print.

Home-printing checklist

  1. Download the finished outline image, rather than a screenshot. Keep the original file.
  2. Open it in an image viewer and use print preview. Choose a supported paper size; A4 portrait is a useful first activity.
  3. Use the setting that fits the entire picture inside the printer's printable area. Keep the image proportions and leave the printer's normal margins. Avoid a fill/crop option that cuts off the picture.
  4. Check the face, feet, tail and other important details in the preview. For a message activity, keep the blank area at the bottom.
  5. Choose the printer's suitable quality setting and paper type. For an outline page, a black-and-white or greyscale print setting can be used if your printer provides one.
  6. Print one sheet first. Check line clarity and whether the spaces suit the child's activity before making more copies.
  7. Use paper your printer supports. Let the ink dry before colouring. Try the chosen crayons, pencils or markers on a spare sheet.
  8. For wet paint, start with a surface made for that paint. If the printer cannot handle it, use the printed outline as a reference for drawing onto suitable art paper.
  9. If you want to keep or reproduce the finished work, let it dry and scan it, or photograph it square-on in even light. Crop the surrounding table and keep the largest original file.

Do not stretch a 2:3 image to fill A4. Fit it proportionally within the printable area; the remaining white space is useful for an activity.

Start with their own character

Our children's bedroom-art guide shows how to create and save a character before building a new adventure. Start there if you would like your child to appear in the picture.

Create your character first →

More ways to make the outlines

A PROMPT TO TRY

A new scene from your character

Image input
Attach your approved child-character illustration as the only image reference.

Suggested template; no generated result is shown. Edit the fields, then make any final changes in the full prompt. Changing a field rebuilds the full prompt.

Attach your approved child-character illustration as the only image reference.

A PROMPT TO TRY

An interest-only activity

Image input
Written description only. No image needed.

Suggested template; no generated result is shown. Edit the fields, then make any final changes in the full prompt. Changing a field rebuilds the full prompt.

Written description only. No image needed.

A PROMPT TO TRY

Make the outlines simpler

Image input
Attach the outline picture you want to simplify.

Suggested template; no generated result is shown. Edit the fields, then make any final changes in the full prompt. Changing a field rebuilds the full prompt.

Attach the outline picture you want to simplify.

Your questions

Can we use this without ordering a print?

Yes. Make a picture, print it at home and enjoy the activity. A framed original or a larger print is an optional next step.

Does my child need to be in the picture?

No. Favourite animals, vehicles, snacks and imagined worlds can make a personal activity without a child character.

Do I need to upload a real child photograph?

No. You can create and approve a character from a description, then use that saved illustration as the scene reference.

Will the outline keep the child looking exactly the same?

A character reference guides the result, but converting painted details to outlines can change its appearance. Check the face, hair and proportions, and refine the result before printing.

Can we use paint instead of pencils?

Choose a surface suited to your paint. Watercolour needs appropriate absorbent paper or a surface prepared for watercolour. Test the combination on a spare piece before making a gift.

Can we paint directly on a YI2C poster or canvas?

Specific paint and marker compatibility on our actual stock has not yet been verified. Use a compatible art surface for your chosen materials, or paint first and print a photograph/scan of the finished work.

Can you print the finished painting?

The completed image can follow the existing artwork-upload route, subject to the file and crop working at the chosen size. Keep a clear scan or photograph at its original resolution and review the print preview.

If you decide to order

Make matching bedroom prints from your approved character →

Enjoy the activity at home, frame your original, or upload a finished file when you are ready. Ordering is optional.

Use your chosen image tool separately; it may have its own access requirements or charges.

CANVAS & POSTER PRINTS