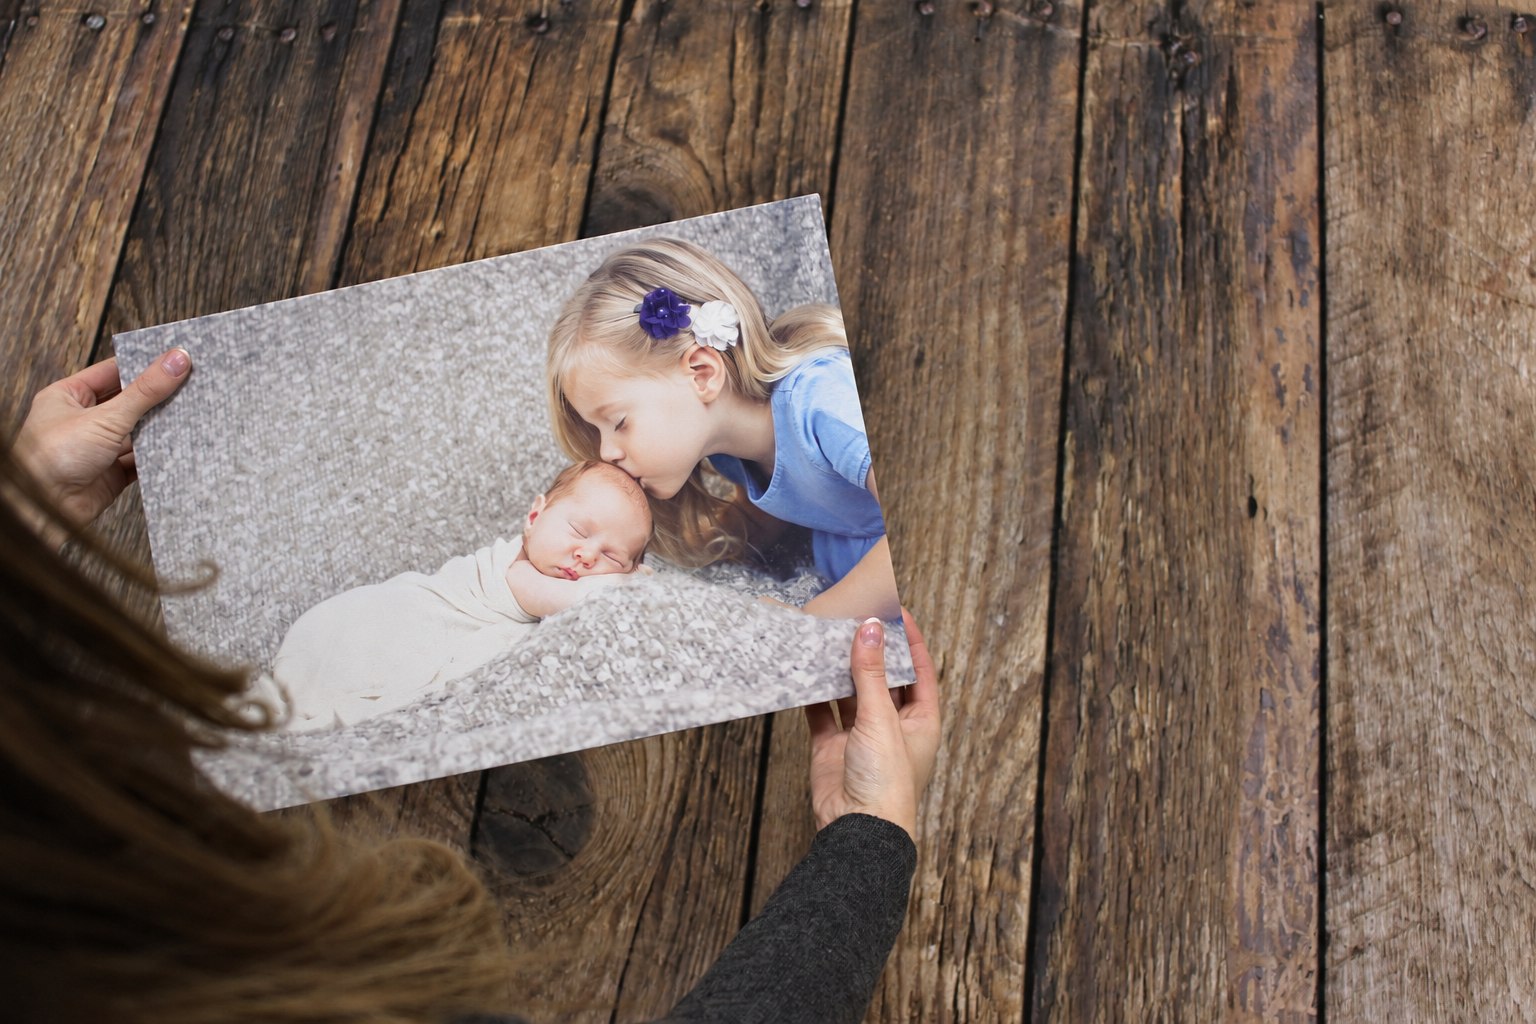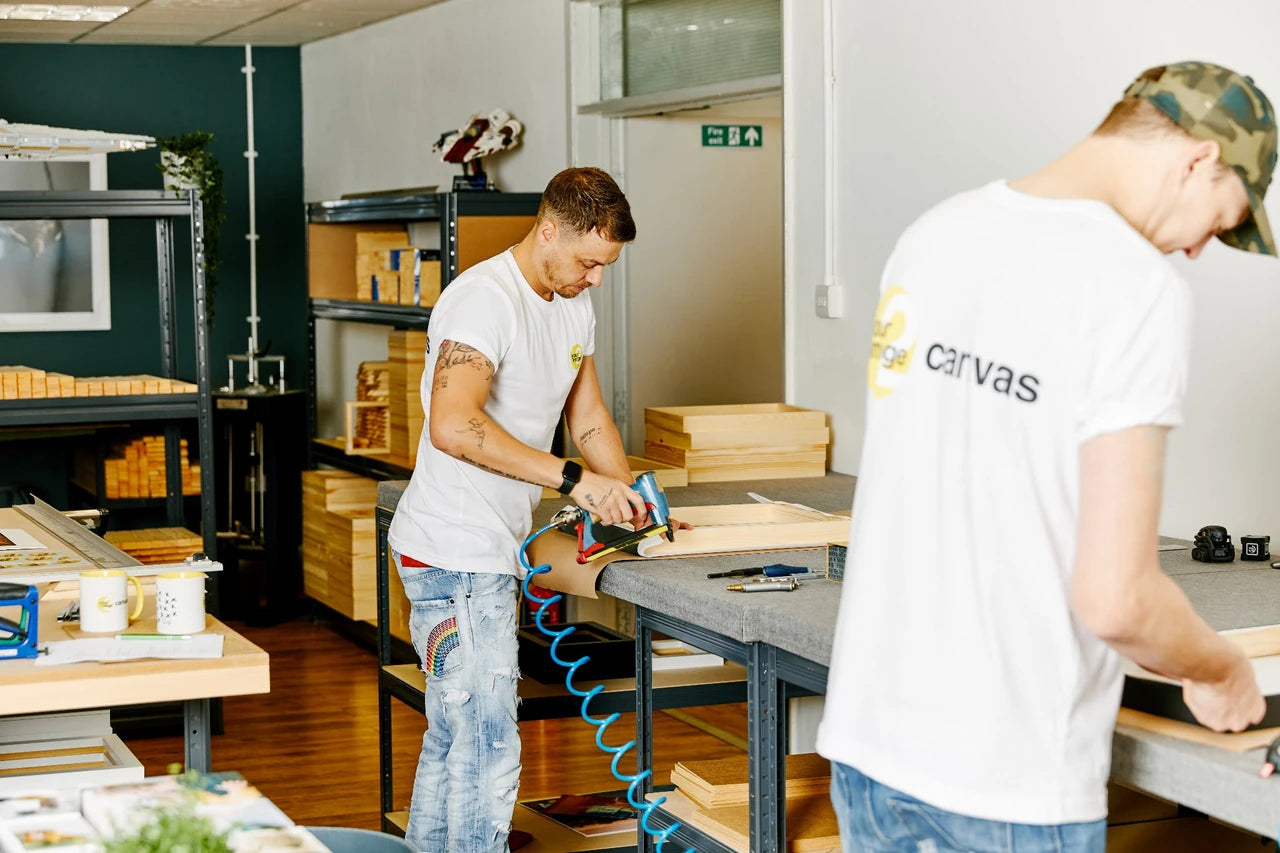
We make a canvas print by printing your photograph onto canvas, building a solid pine frame, then stretching and finishing the print by hand. At Your Image 2 Canvas, that work happens in our West Yorkshire workshop. We use 230gsm matte poly-cotton canvas, an Epson SC-P20000 printer and genuine Epson inks. Before a finished print leaves, we check the photograph, the stretched surface, the sides and the corners.
Here is the part you cannot see in an order confirmation: the work that turns a file on your phone into a finished canvas for your wall. We are a family-run business and have been making prints since 2007. These photographs show our materials, our tools and the people making the prints.
Before the canvas reaches the printer
The photograph comes first. A well-made frame cannot bring back detail that was lost before the file reached us. We look at the image and its layout for the chosen print: the detail available, the crop and anything important sitting close to an edge.
Use the best version you have. That may be the original from your phone, the full-resolution photograph supplied by your photographer, or your finished edit saved at full size. A screenshot of the same picture can contain far fewer pixels. Sending it through a messaging app or saving it from social media may also reduce it.
If somebody else has the photograph, ask them for the file rather than a screenshot of it. Our guide to sending original photos without losing quality explains how. If you are unsure what your picture can manage, check whether your photo is good enough for canvas before choosing a size.
We want the print to do justice to the photograph you chose. That includes recognising its limits. Printing a soft photograph on good canvas does not turn it into a sharply focused original, and a quality check is not an instruction to retouch somebody's face.
The front and the sides need planning together
A stretched canvas has depth. There is a flat picture on the front, then fabric going around the wooden frame to the back. The layout has to allow for that before printing begins.
With a gallery wrap, the photograph continues around the sides. That can work beautifully with a landscape or a portrait with room around the subject. It needs more care when a face, hand, pet's ear or line of writing is close to the edge. Something visible in the full digital photograph may end up on the side rather than the front.
A mirror wrap repeats and reflects the edge of the photograph to supply side material. It can help keep the main composition on the front, but it cannot reveal scenery the camera never captured. Distinctive objects near an edge may repeat or look unusual when reflected. A mirrored arm, building or piece of lettering deserves a careful look.
The front still has to fit the proportions of your chosen canvas. Mirror sides do not automatically make a portrait photograph fit a square without cropping. Check which parts of the original remain on the front as well as what happens around the sides.
Check the front and the edge treatment in the creator's preview. Our mirror wrap and gallery wrap guide shows what to look for. If the photograph is already tightly cropped, ask us before ordering rather than assuming a different wrap will solve every problem.
Printing onto 230gsm matte poly-cotton canvas
We print onto 230gsm matte poly-cotton canvas. Poly-cotton describes the material blend; gsm describes its weight per square metre. The matte finish and woven surface are part of how the finished print looks. You can see that texture in a close photograph of a real canvas.
It is a different surface from smooth photo paper. Fine detail sits within that woven texture, which is one reason to judge a canvas as a finished print at its intended size as well as looking closely at the file. A small thumbnail cannot tell you much about either.
Our printer is an Epson SC-P20000, using genuine Epson inks. It is professional large-format equipment, but the machine name is only one part of the job. The file, material, layout and finishing still matter. We print the prepared photograph with the area needed for the chosen front and sides.
There is a practical difference between a screen and a print, too. Your phone produces its own light; a canvas reflects the light in the room. Turning your screen brightness up does not make the printed photograph brighter. If an image is very dark, look at it with that in mind before submitting it.
The photographs on this page show what our printing and finishing produce together. For more about the equipment and print preparation, read our separate guide to canvas printing with the Epson SureColor SC-P20000. Epson's own technical information is also linked below.
We cut and build the pine frame
The canvas needs a frame underneath it. This is the stretcher frame: the internal timber structure that supports the fabric and gives the finished canvas its depth. It is separate from an optional decorative floating frame.
We make our stretcher frames from solid pine in the workshop. The timber is cut to the required lengths with 45-degree mitres. Each end needs to meet its neighbouring piece properly so the corners form the rectangle the photograph needs.
We then pin the corners and build the frame by hand. Accurate cutting and careful joining matter because the print will take the shape of the frame beneath it. This stage is easy to overlook when you are shopping from a front-on product image, but it is part of making a tidy, supported canvas.
There is no mystery to the bare timber. In the workshop photographs you can see the grain, the cuts and the joined corners before a photograph covers them. That is why we show the frame-making as well as the finished print. The work underneath belongs in the story.
Cutting, joining and stretching are connected jobs. A frame has to be ready before the printed fabric can be pulled around it. Making both here lets us carry the same order through those stages in our own workshop.
Stretching the print by hand
Once the print and its frame are ready, the fabric is positioned over the timber. This is where the planned layout has to become the actual front and sides. We line up the photograph, stretch the canvas around the frame and secure it at the back.
Stretching is a hand-finished part of the process. It is about distributing the pull around the frame, keeping the picture positioned properly and working the fabric into a tidy finish. The aim is an even front surface, with the image sitting where it should.
Pulling harder is not the whole answer. The alignment matters as much as the tension. A horizon that looks level in a file should not be carelessly tilted during finishing. A subject positioned deliberately away from an edge needs to stay where the layout puts it.
The corners take care. Fabric has to fold around a three-dimensional object, and those folds need to be managed neatly. The side view tells you something that the front alone cannot: how the material turns around the timber and how the corner has been finished.
That is one reason we include close photographs. You should be able to look at the wrapped sides and corners, not just admire a picture from across a room. Some of the workshop photographs are taken under ordinary working light. They show the actual print and the actual finish.
Choosing the depth and an optional floating frame
Our Slim canvas is 0.75 inches deep; Chunky is 1.75 inches deep. Both are stretched over solid pine. At the same canvas size, Slim and Chunky currently share the same base price. The difference is how far the finished piece projects from the wall and how much side you see.
The chosen depth also matters when considering the wrap. A deeper side occupies more physical space, so check the layout for the depth you intend to order. The size of the photograph on the front and the frame depth describe different things.
You can also choose an optional real-wood floating frame around the stretched canvas. It adds an outer border with a visible gap around the canvas. It does not replace the timber stretcher underneath, and a canvas can be displayed without this extra frame.
For a closer comparison, see Slim, Chunky and floating-frame canvas finishes. The creator and our current prices page show the choices and price for your selected size.
What we check before packing
We check the finished canvas as a whole. The photograph on the front matters, but so do the parts you see when you walk past it or lift it out of the packaging.
- The printed picture: the chosen image, its placement and any visible print problem.
- The front surface: how the fabric sits over the frame, including visible slack or unevenness.
- The sides: whether the planned wrap sits properly around the frame.
- The corners and finish: the folds and the overall appearance of the completed canvas.
Those checks should preserve the character of your photograph. A shallow-focus portrait may have a deliberately blurred background. An older family picture may contain grain or limited detail. We do not treat every soft area as a production fault, or pretend that every photograph should have the same sharpness.
If you are judging a canvas yourself, look at both the image and the construction. Stand at a normal viewing distance, then look at the side and corner. Good workmanship should make sense from those angles as well. You can see more close photographs on our canvas print quality page.
Packed here, then on its way
The finished canvas is packed for delivery after checking. Printing, building the frame, stretching and packing all happen in our West Yorkshire workshop. There are several jobs between receiving a photograph and sending out the parcel, even when the turnaround is quick.
Orders placed before 2pm on working days, with artwork ready to print, can be dispatched the same day. Next-working-day delivery is expected for eligible orders, rather than guaranteed. Check our current delivery information for the terms, destinations and any exceptions, particularly if you need a gift for a particular date.
Your canvas arrives stretched over its timber frame. A hanging kit is an optional extra; choose the appropriate fixing arrangement for your wall. Our guide to hanging a canvas print explains the practical checks.
Questions about how canvas prints are made
Are canvas prints printed directly onto the fabric?
Yes. Your photograph is printed onto the canvas material. That printed fabric is then stretched over the internal wooden frame. The photograph is not a paper print placed behind glass, and the optional floating frame is a separate outer finish.
What canvas material do you use?
We use 230gsm poly-cotton canvas with a matte finish. It has a woven surface that you can see in close-up photographs. That surface is different from smooth poster paper, so consider the texture as part of the look you want.
What printer and inks do you use?
We print with an Epson SC-P20000 using genuine Epson inks. The printer works alongside the prepared file, the canvas and the finishing process. Its specification does not remove the need for a suitable photograph or a careful crop.
Do you make the wooden frames yourselves?
Yes. We cut solid pine to size with 45-degree mitres, pin the corners and build the stretcher frames in our workshop. Those frames sit underneath the canvas and are separate from the optional floating frame around the outside.
Will wrapping my photo around the sides crop it?
A gallery wrap uses part of the image around the sides, so check what remains visible on the front. Mirror wrap reflects edge detail instead, but repeated objects can look odd. Review the chosen edge treatment, depth and crop together before ordering.
Is a deeper canvas better quality?
Choose the depth for the appearance you prefer. Slim is 0.75 inches deep and Chunky is 1.75 inches deep; both use solid pine and currently share the same base price at a given size. The deeper option makes the side more prominent.
Can a small or blurry image still become a canvas?
Sometimes a smaller print is a sensible choice, but the material and printer cannot restore information the file never contained. Start with the best available original and consider the size, crop and viewing distance. Ask us if you are unsure before placing the order.
How long does making a canvas print take?
With artwork ready to print, orders placed before 2pm on working days can be dispatched the same day. The expected next-working-day delivery is subject to the current delivery terms and is not a guarantee. Time-sensitive gifts are worth planning with that distinction in mind.
A photograph you care about, made properly
The point of all this work is the finished canvas: a photograph you want to keep seeing, with a frame and finish that have had proper attention. You can see the printing, timber and corners here because we are proud of the work that goes into them.
For the materials and costs behind the price, read why our canvas prints are good value. If you have your photograph ready, create your canvas and check the size, crop and finish in the preview.